Even more patience and practice, but mostly patience.
-
So recently I just finished this extra credit project, and I got too into it again. These posts would be hella longer if I didn't shorten my sentences with all the ramble talk and segments I go off on so there will always be some info missing on my process, and for that, I apologise. Anyways, here are some cool things I made.
*On a reflective note, as I have never done 3d object design before other than Minecraft. I gotta say it's like Minecraft but more complex, but still has some aspects like the game like controls and commands and stuff. Moreover, with its complexities, it allows less blocky figures than I could replicate/create in Minecraft overall which is sick! The only problem is processing and running problem with programs but oh well.*
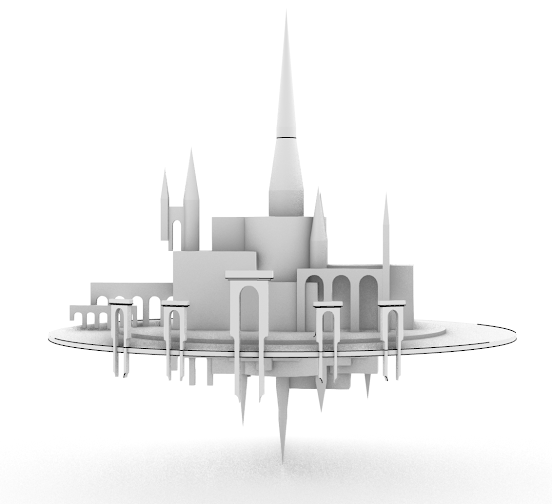
Unfinished Flying Castle:
will probably do more on this in time, but for now, I did a very simple layout of stuff based on the unfinished design I did way below.
Development of Architectural Design
Top super-secret planning technique past down for ages specifically for portion planning and stuff, yet not exactly.
I remember from junior high or so during construction class, we had to make blueprints and such and the way our instructor taught us was using this method where you would have 3 views of the object in like an L shape to get the correct perspectives of the objects. Below I used a simplified version only using 2 views as I was a bit too lazy to create the side view which would determine the gate's width.
To make this an even faster process, as its symmetrical, I created 1/4 of the object and mirrored it a few times to create the entire gate. Its almost like making a paper snowflake but instead you get a gate
How I did the roof shape in short...
First of all, I took the curve from the drawing's roof, extended, extruded, and filled in gaps and such using 3 different methods as its curvature gave me hell.
This goblin of a mass was way more problematic but I won't rant too much on it, in short, the same (problem & process above) x 10 + bit more spice.
Above is me trying to align the cylinders using a rectangle to find the width difference
*the box behind isn't aligned to the exact diameter of the cylinders as it looked too thick with the box being the same girth as the cylinders.
The only thing I wish I could do was to make the railgun I had in mind, something like a long-range artillery turret maybe but this week is sleeping week.
Ideas thought of to use for this practice
Blueprint of the flying city:
I'm tired of writing for this post so ciao.


Comments
Post a Comment